
Welcome back to the craft room for today’s DIY Gift Card Envelopes in Three Easy Designs post. Today I’m showing you three easy DIY envelopes that you can make with either pattern paper or cardstock. We’ll create a small envelope for cash, one that’s perfect for a standard gift card, and a larger version for those packaged gift cards. Then I’ll share a few simple decorating ideas so you can customize them for any occasion.
Whether you’re joining me for Christmas in July or simply planning ahead for the holidays, these envelopes are easy to make and simple to customize.
Let’s get started!
Free PDF Download
To help make things easy for you, I have created a free PDF download with all of the measurements. You can grab that here: Gift Card Cash Envelope Guide.
Cash Envelope
Let’s start with the cash envelope. Because I am using a dark green linen textured cardstock from my local print shop, I am showing you photos of the base project made with Recollections kraft cardstock. Hopefully it’s much easier to see than it would be on the dark green cardstock.
To keep this tutorial easy to follow without filling the post with dozens of step-by-step photos, I’ve combined the cutting, scoring, and trimming information into one or two reference images for each envelope style.
Start by cutting your cardstock to 8″ x 7″. Next, score on the 8″ side at 3/4″ and 7 1/4″. Then rotate the cardstock to the 7″ side and score at 2″ and 5″. Your panel should resemble the photo below.

Next, remove the small rectangles at the top and bottom corners of the panel. After cutting straight up to the horizontal score line, trim the corners at an angle to remove some of the bulk for a cleaner fold. If you would like, you can round the corners on the top and bottom flap. I used the We R Memory Keepers Corner Chomper’s 1/2″ round.

After folding and burnishing the score lines, I like to add my pattern paper before gluing my envelope closed. For today’s cash envelope I am using a green plaid pattern paper from The Paper Studio’s Winter Berry paper pad. The back panel is cut to 6 1/4″ x 2 3/4″ while the top flap panel is cut to 6 1/4″ x 1 3/4″.
If you rounded the corners on the envelope base, don’t forget to round the matching pattern paper panel as well. With this non-directional paper, it doesn’t matter which side I punch, but if your paper has a direction, pay attention to that before punching.

To glue the cash envelope together I am using Bearly Art Precision Craft Glue. Because the bottom flap does not go all the way to the top of the envelope, I like to add a bit of glue to the base of the side flaps and near the top of the bottom flap. This is a great way to ensure the envelope is glued securely without worrying about accidentally gluing the envelope closed.

To finish off my cash envelope, I added a bit of 1/4″ Scor-Tape to the top flap. To decorate the envelope I have created a simple gift tag made with Recollections Gold Foil Cardstock cut to 2 1/2″ x 1 1/2″. It is topped with a scrap piece of 110 lb Recollections white cardstock that measures 2 1/4″ x 1 1/4″. Rather than digging out my stamps and inks, I used the Tombow Fudenosuke Hard Tip Brush Pen to add the “To” and “From” on the tag.
One of my favorite things about making DIY gift card envelopes is decorating them with die cuts and embellishments I’ve had tucked away in my stash. It’s a great way to use those little handmade pieces instead of letting them sit in a drawer waiting for the perfect project.
To finish decorating the envelope, I am using a beautiful ornament from an Elizabeth Craft Designs die set. I have had a few of these finished ornaments in my stash for a few years and decided today’s project was the perfect place to use them. They’re cut from Recollections red glitter cardstock and gold metallic cardstock.

Standard Gift Card Envelope
The next set of DIY gift card envelopes is for a standard gift card like you would get from Hobby Lobby. Today I am showing you two examples—one made from a heavier weight pattern paper and one from cardstock. Again, I have photographed the envelope base in kraft cardstock so it is easier to see.
This envelope starts with a piece of pattern paper or cardstock cut to 4 1/2″ x 6″. Place the cardstock in the scoreboard on the 4 1/2″ side and score at 1/2″ and 4″. Rotate the cardstock to the 6″ side and score at 1 3/4″ and 4 1/4″.

Once again we will be removing the small rectangles indicated with the X’s in the photo above. I have again decided to round the corners on the top and bottom flaps with the We R Memory Keepers Corner Chomper. Although the 1/4″ setting would look nice on this smaller envelope, I still prefer the softer look of the 1/2″ corner.

Pattern Paper Gift Card Envelope
After folding and burnishing the score lines and gluing the pattern paper envelope closed, it is time to decorate it. After another tour through my craft stash, I found an adorable little snowman die cut. He’s from a Sizzix Thinlits set that I’ve had for about as long as I’ve been creating my own cards. Even though I had run the snowman through my Xyron Sticker Maker years ago, I still added a little bit of Bearly Art Glue to ensure it would stay on the envelope.
Because this cute little guy takes up a fair bit of room, I added a small gift tag. The gold foil mat measures 1 1/2″ x 1″ while the white cardstock comes in at 1 1/4″ x 3/4″. Again, I used my Tombow Hard Tip Brush Pen to add the “To.”


Cardstock Gift Card Envelope
For the standard gift card envelope made with cardstock, I am decorating it with more of the Winter Berry pattern paper from The Paper Studio. The back panel is cut to 3 1/4″ x 2 1/4″ while the top flap panel is cut to 3 1/4″ x 1 1/2″.
To my eye, this paper definitely has a direction since the majority of the holly leaves are pointing up. With that in mind, I paid a little more attention before rounding the corners.

To decorate the front of this envelope I am using another Elizabeth Craft Designs ornament. The gold foil base of the gift tag measures 2″ x 1″, with the white cardstock measuring 1 3/4″ x 3/4″.


Packaged Gift Card Envelope
Have you ever purchased something because you were afraid of “missing out on something”? For me, one of those purchases was the We R Memory Keepers Gift Bag Punch Board. I can honestly say I used it to make exactly one gift bag before it disappeared into the closet and I completely forgot about it.
Fast forward a couple of years and I dragged it back out to create an envelope sleeve for packaged Visa-style gift cards. Today I am going to show you how to make the same envelope both with and without the punch board.
Packaged Gift Card Envelope with Punch Board
Starting with a piece of cardstock that measures 7 3/4″ x 6 3/4″, score on the long side at 2″ and 5″.

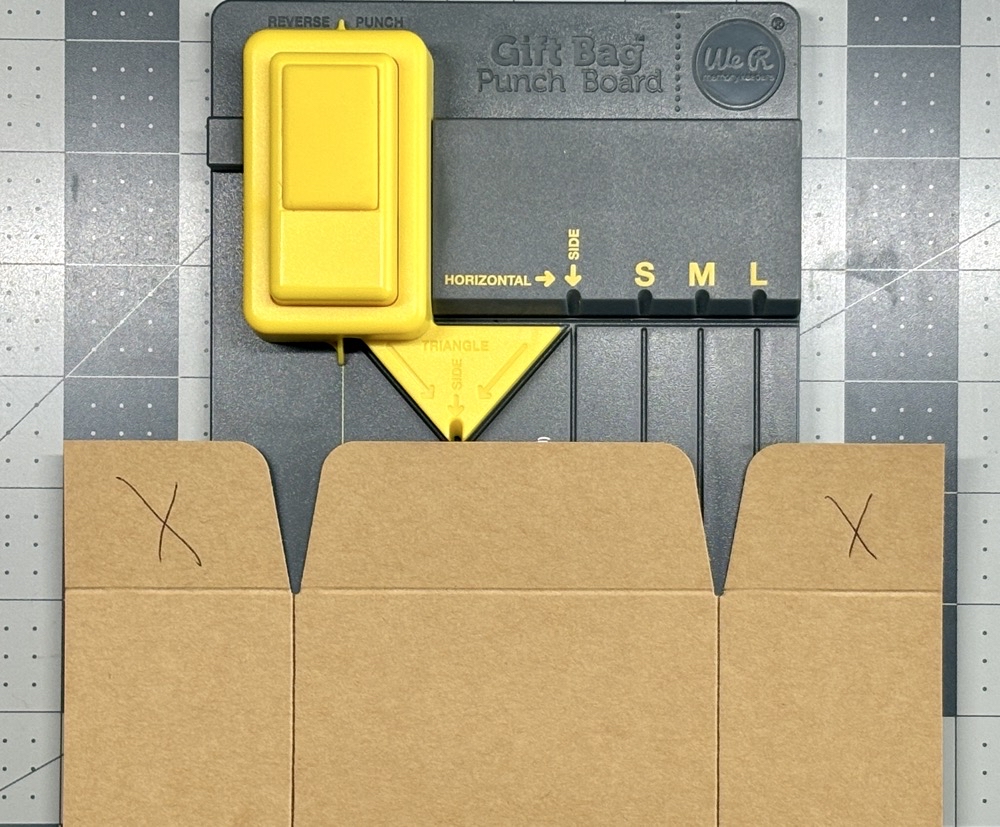
Next, let’s bring in the Gift Bag Punch Board. After sliding the cardstock into the board, line up the first score line with the tick mark on the board. Punch and then, using the provided scoring tool, score the cardstock. You won’t be able to score the entire width of the cardstock at once, but we’ll take care of that in just a minute.

Then slide the cardstock to the next score line and again line it up with the tick mark. Punch and score.

Now, to complete the scoring, slide the cardstock to the right until you are able to score across the entire length of the cardstock. For me, it took three additional passes. Next, remove the two side tabs so your envelope base looks like the photo below.
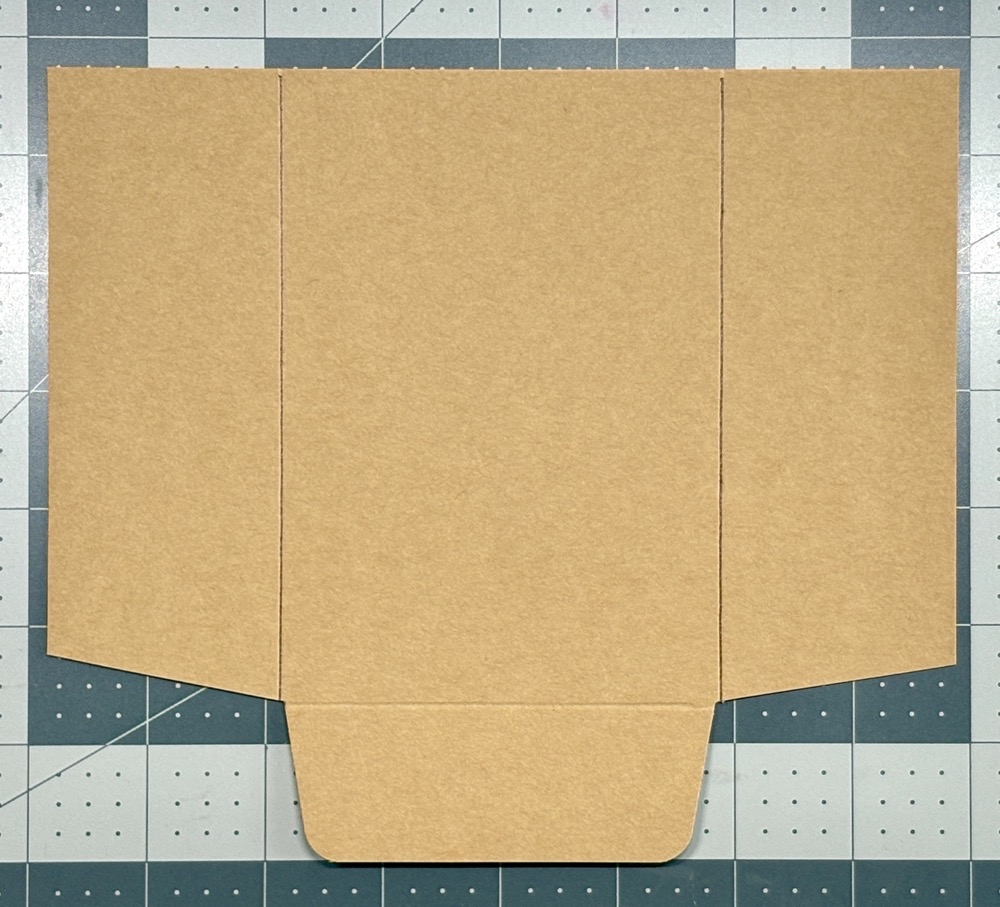
Packaged Gift Card Envelope without a Punch Board
To create this same envelope without the punch board, start with the same 7 3/4″ x 6 3/4″ piece of cardstock. On the long side, score at 2″ and 5″. Now rotate the cardstock to the 6 3/4″ side and score at 1 1/4″. Cut along the score lines and remove the two outer tabs.
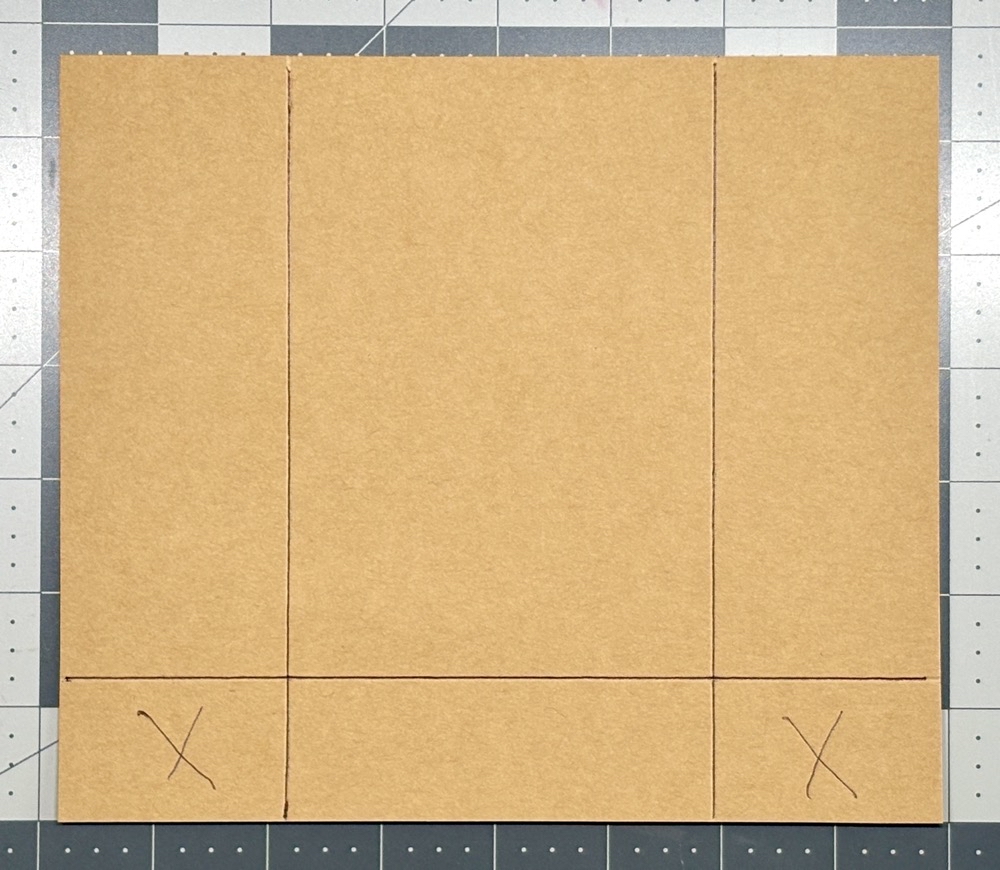
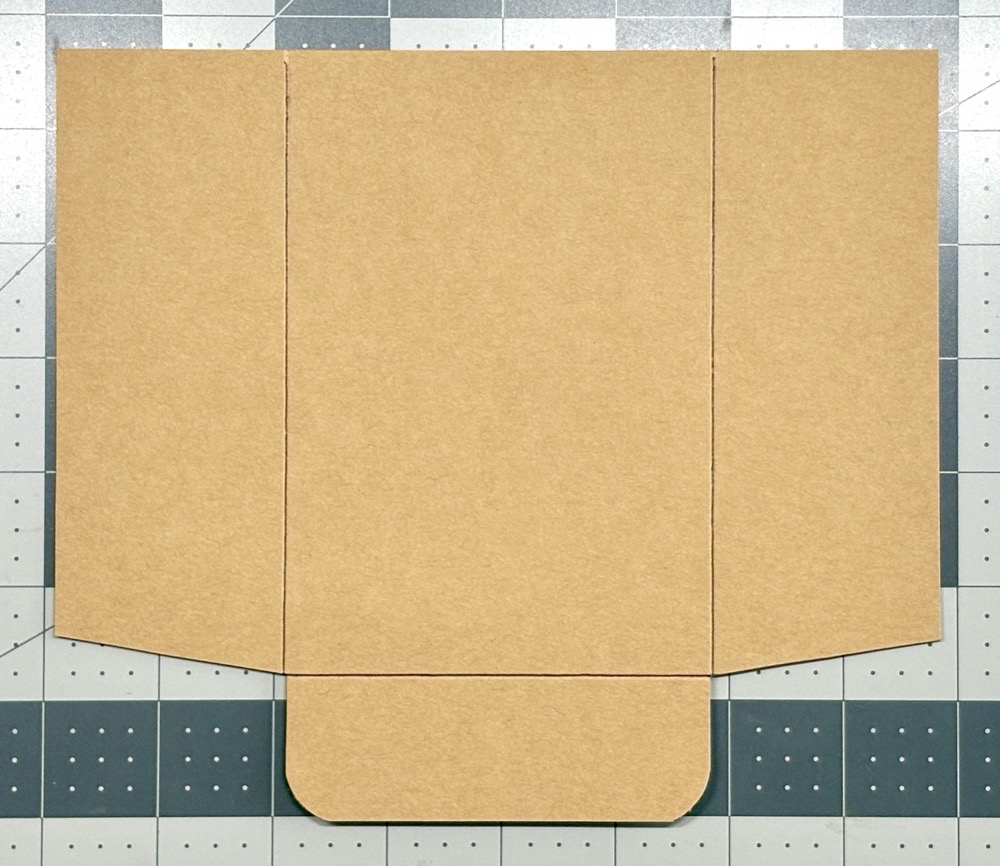
From this point on, creating the packaged gift card holder is exactly the same. Start by folding and burnishing the score lines. Before applying adhesive to close the envelope, I like to cut a finger notch at the top. With the envelope folded closed, I used a 1″ circle punch to make the notch.

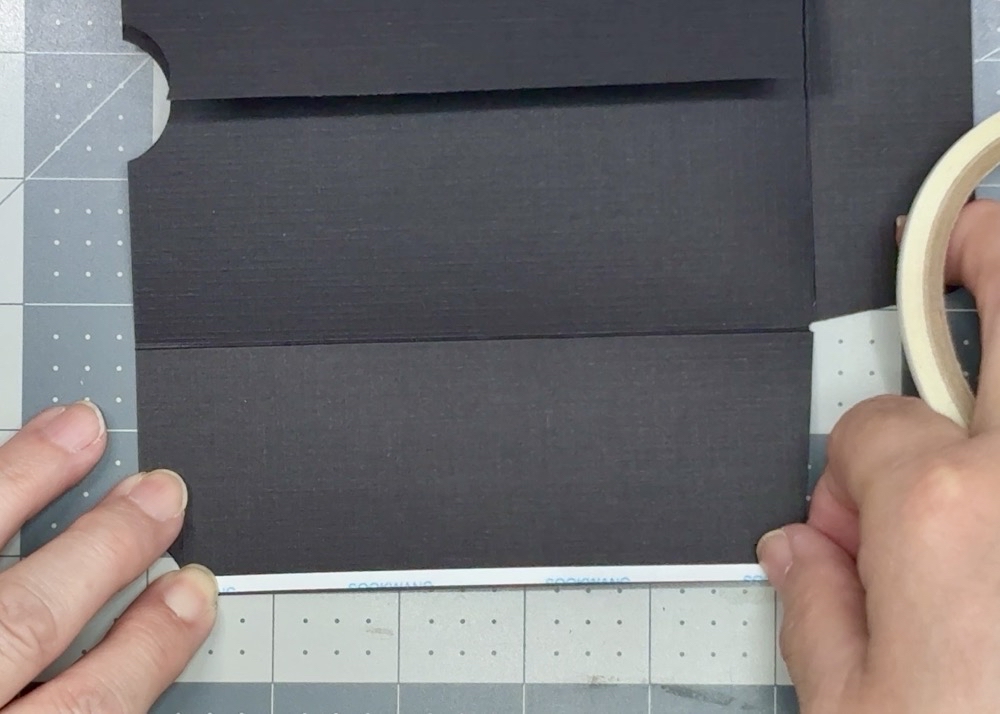
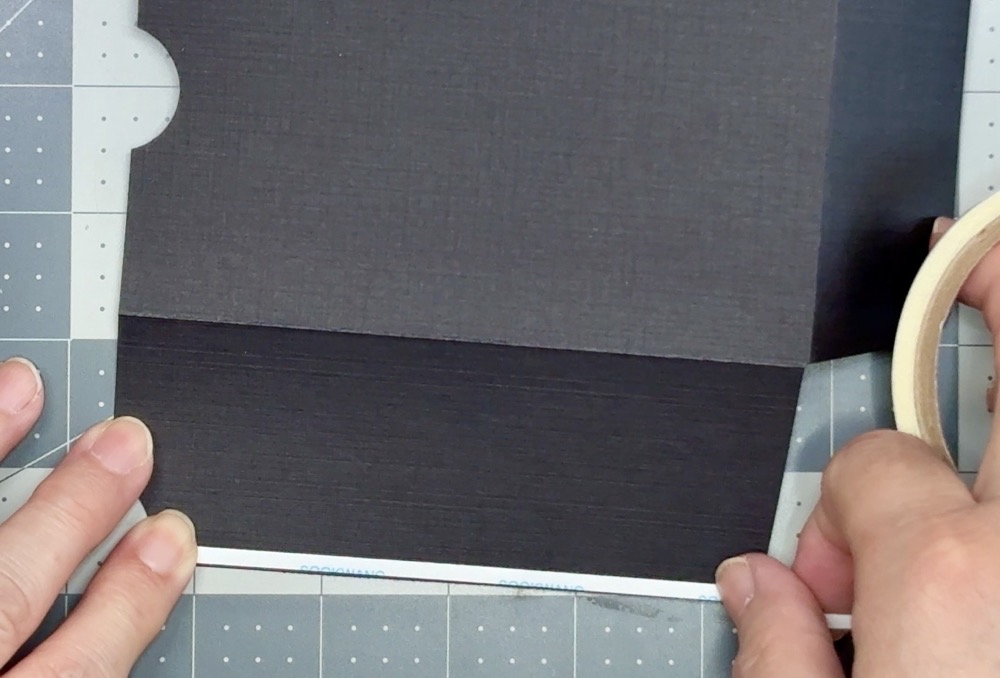
Because there is such a small overlap on the sides, I like to use 1/8″ Scor-Tape. Place one piece on the inside of one of the side flaps and on the outside of the other flap. This may be a little bit of overkill, but hey, I use too much tape on regular Christmas gifts, so why not here as well?
To secure the bottom flap over the top of the side flaps, I use 1/4″ Scor-Tape with a small line of Bearly Art Glue along the base of the side flaps.
Decorating Your DIY Gift Card Envelopes
I decided to decorate these two DIY gift card envelopes a little differently. Starting with the envelope made without the punch board, I used a piece of 65 lb kraft cardstock from Recollections. To cover the front of the envelope, I used a piece of Christmas Script pattern paper from Colorbok. This piece measures 3 1/2″ x 5 1/4″. The gift tag mat measures 2 1/2″ x 1 1/2″, with the cream-colored Recollections cardstock cut to 2 1/4″ x 1 1/4″.

For the envelope made with the punch board, I went a little more elaborate. The base of the envelope is made from black linen textured cardstock that I get from my local print shop. I covered it with a piece of black plaid pattern paper from a Recollections paper pad. Again, that pattern paper measures 3 1/2″ x 5 1/4″.
The poinsettia is cut from three shades of red Recollections cardstock using the Tim Holtz Tattered Poinsettia Bigz die. To add a little more definition between the flower layers, I colored each one with the R59 Copic marker. The flower center is made with Pops of Color in Orange Creamsicle, which gives the entire flower the perfect finishing touch. The tag is cut to the same measurements as the other gift tag: 2 1/2″ x 1 1/2″ for the gold foil mat and 2 1/4″ x 1 1/4″ for the white cardstock.


Final Thoughts
Thank you so much for joining me for today’s DIY Gift Card Envelopes in Three Easy Designs post. I hope these three envelope ideas have shown you just how easy it is to create a handmade holder for gift cards and cash. Whether you choose pattern paper or cardstock, they’re simple to customize for Christmas, birthdays, graduations, or any occasion.
Whether you’re getting a head start during Christmas in July or making them later in the season, I hope these ideas inspire you to add a handmade touch to your gift giving.

Just one quick reminder before we finish—if you’re making your envelopes with pattern paper, a heavier weight paper will give you the best results and make a sturdier envelope.
And one more idea for those larger packaged gift cards. If your package has a hang tag at the top, try threading a coordinating ribbon through the hole and securing it with a staple. It’s a simple little touch that really dresses it up.
Ready to make your own DIY gift card envelopes? Don’t forget to grab the free PDF download. It includes all of the measurements and scoring guides for each envelope style, everything you need in one convenient place. You can download the DIY Gift Card Envelope Guide here.
Now I’d love to hear from you! Which of the three envelope styles is your favorite? Do you usually give gift cards, cash, or a little of both?
If you would like to check out even more gift card ideas for every occasion, you can find them here: Gift Card Holders.
Until then, have a fantastic week. Don’t forget to join me next week for the final 2026 Christmas in July post.
Shop for Supplies Here

PIN THIS POST FOR LATER!
