
Welcome back to the craft room and today’s Flashback Friday The Faux Bow post. One thing I very rarely put on a card is a bow. Why? Because I have such a difficult time tying a nice looking bow. I spend so much time trying to produce the perfect card, I just don’t want to ruin it with a janky looking piece of ribbon.
One way to add a bow without actually tying a bow, is to use the Faux Bow method. Today I’m going to take you all the way back to December 2008 when I did my best to recreate the Faux Bow on a card front. Since I’ve been asked by a lovely blog subscriber to make a video of this technique, I thought it was an appropriate time to bring this Flashback Friday post to life. The following video will demonstrate this technique, along with a few other techniques to create a bow. You can also follow along below with a photo and written tutorial for the faux bow if you prefer.
The Faux Bow
I made a variation of the “faux bow” a few years ago at a make and take booth and loved how simple it was to create. A couple of days ago I saw another version of it that looked just as pretty. With no photo’s to go along with the directions, it took me a few tries to figure it out, so I thought I’d add a few images of my own to help out other visual learners.
Step One:
Create two holes on the card where you want your bow.

Step Two:
Thread a length of ribbon from the front side of the card to the back.

Step Three:
Create a loop with the ribbon on the right-hand side and thread this loop through the left-hand side hole.

Step Four:
Repeat step three with the left-hand ribbon, creating a loop and threading it through to the front. After the loop is threaded through, take the ribbon tail from the previous step and threat the end under the loop that you just inserted on the right hand side. Then insert the last ribbon tail on the backside of the card through to the front side, under the first loop.

Step Five:
Carefully adjust the loops on the front to the desired size, while making sure the ribbon on the back of the card is snug to the cardstock. Snip the ends to the length you like.
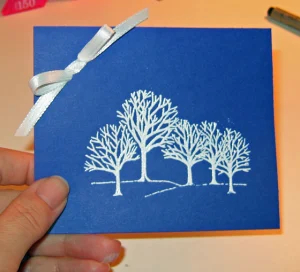
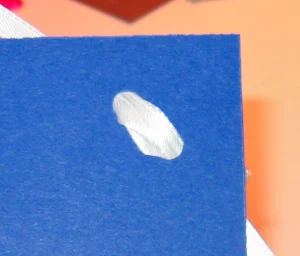
And there you go! If you have any questions, let me know and I’ll see if I can clarify it for you.
Thank you for joining me for today’s Flashback Friday The Faux Bow post. Have you ever used this type of bow on a card? Or are you someone who can tie the perfect bow? Let me know in the comments below. I’m also curious what tips and tricks you all have for tying the perfect bow. Until then, have a fantastic weekend and I will see you back in the craft room again real soon!
PIN THIS POST FOR LATER!
