
Welcome back to the craft room and today’s How to Make Beautiful Double Vision Cards Easily post. Recently I have seen a lot of videos featuring the Double Vision card technique, and I was so intrigued that I had to give it a try for myself.
I did make a slight change to the typical version of this technique. Most of the examples I’ve seen use two pieces of the same design of patterned paper. Instead, I used just one. And honestly? I love how it turned out. Let me walk you through how I made these beautiful and interesting cards.
What Are Double Vision Cards?
If you are anything like me, you have seen the Eclipse card technique before. This is where you typically have a word that is cut from a piece of patterned paper and placed back in after being popped up in some fashion.
Double Vision cards are similar in that part of the design is popped up, but rather than just highlighting a word, the entire design is used. When the card is finished, it almost looks like the image is “shifting,” which is such a fun visual effect.
This technique works especially well with pattern paper that has a scene. I also found it works beautifully with larger floral designs that can sometimes feel tricky to use on an A2 card. Let me show you how I took a 6″ x 12″ scrap piece of patterned paper and turned it into two beautiful cards.
Choosing Pattern Paper for Double Vision Cards
For today’s cards, I’m using a piece of pattern paper from the Recollections Sunset Fields paper pad. I’ve had this paper in my stash for a couple of years now.
While I absolutely love the large floral images in this pad, they can sometimes be a little tricky to work onto an A2 card without feeling like the design is just a bit too big.

The sheet I’m using today features this beautiful sunflower border. There are so many things I love about this pattern, especially the warm color palette. I’ve been wanting to use it for a while, and I’m really glad I waited for a technique like this.

Vertical Double Vision Card Layout (Step-by-Step)
For today’s project, I’m making two cards from this one sheet—a vertical card and a horizontal card.
To get started, I cut the paper down to the widths I’ll be using:
- 4″ wide for the vertical card
- 3.75″ wide for the horizontal card
Starting with the vertical card layout, I trimmed that panel down to a finished size of 4″ x 5.25″.

Cutting the Paper Strips
On the 4″ side of the pattern paper, I used my Tim Holtz paper trimmer and cut it into ½” strips.
To make sure the image stayed intact across the card front, I set the strips aside in the exact order that I cut them. This really makes a difference when it’s time to put everything back together.
Before we move on, let me explain what will be happening in the next step. To create the Double Vision effect, glue every other strip down onto the card, while the remaining strips will be popped up for dimension.
Below is a visual showing how the lower strips are adhered flat and the upper strips are raised.

To achieve the height needed for the effect, I am using ½” x 5 ½” strips of 110 lb cream-colored cardstock from Recollections. Because I like a bit more dimension, I doubled them up—cutting a total of 8 strips and gluing them together in pairs.

Putting together the Double Vision Card
To start assembling the card, I will use a piece of cardstock cut to the same size as the pattern paper panel (4″ x 5.25″).
To help keep everything aligned, I brought in my Mini MISTI.
Starting at the left side of the panel, I glued the first strip down. Then place the next strip right next to it—but did not glue it. This acts as a spacer to ensure even placement across the card.
To keep those spacer strips from shifting, I used a magnet while I worked my way across the panel.

After adhering every other strip, the panel will look like this:

Next, I glued two cardstock strips together, added the patterned strip on top, and then adhered that stack into the open spaces.
Because we used the patterned paper strips as placeholders earlier, everything lines up really nicely.

Once all of the strips are in place, you’ll see your Double Vision panel come together like this:

Adding a Sentiment to Your Card
Rather than pulling out my stamps and inks for this first card, I decided to use one of the words from the cut-apart sheet in the paper pad. I layered it with scrap pieces of Recollections brown and cream cardstock to give it a bit more presence on the card front.

Below is the finished vertical Double Vision card.
For the mat, I used a piece of cream cardstock cut to 4 1/8″ x 5 3/8″. The card base is the brown cardstock from the Recollections Coffee and Cream paper pack, cut to 8 1/2″ x 5 1/2″ and scored at 4 1/4″.

Horizontal Card Layout
To create the horizontal layout, I used the remaining piece of patterned paper.
Here are the measurements:
- Pattern paper cut to 5″ x 3 3/4″
- Cardstock backer cut to 5″ x 3 3/4″
- Cardstock strips cut to 1/2″ x 3 3/4″
- cut 5 for a single layer or 10 for a double layer
Using the same process (and my Mini MISTI again for alignment), I glued every other patterned strip onto the cardstock backer.

Once the stacked strips and patterned paper were added, the finished panel looked like this:

Finishing the Horizontal Card
For the sentiment, I used another word from the cut-apart sheet. To help it stand out against the woodgrain background, I layered it with both brown and cream cardstock.

To finish the card, I added a cream mat cut to 5 1/4″ x 4″ and adhered everything to a top-folding brown card base.

More Double Vision Card Ideas
I’m not gonna lie—I had a lot of fun creating these cards! Once I got started, I just kept going and ended up making a few more cards and even a couple of extra card fronts.
Example #1 Christmas Card
For this card, I used a 6″ x 8″ piece of pattern paper from the Simple Stories Holly Jolly paper pad.
To create the dimension, I used two layers of 65 lb cardstock behind the patterned strips. This gives a more subtle lift while still creating that great Double Vision effect.
The sentiment is from an older Christmas stamp set and is stamped using Gina K Designs Amalgam ink. I paired it with a beautiful red Bazzill Basics textured cardstock for the mat layers.

Example #2 Masculine Birthday Card
For this example, I started with a pattern paper from the 7 Gypsies Avignon paper pad. This one has a much busier design.
While I do like the softer dimension from using two layers of 65 lb cardstock, I do wish I had used something thicker here to create a bit more separation.
Another idea I had after finishing the card was to add some light ink blending along the edges of the raised strips. I think that would have added even more definition.
The sentiment is from the Occasions stamp set by Kaisercraft, stamped with Amalgam ink. The mat layer is cut to 5 1/4″ x 4″ and adhered to an A2 card base.

Example #3 Fall Thankful Card
This card uses another sheet from the Sunset Fields paper pad.
The mat is a scrap piece of linen-textured green cardstock from my local print shop, cut to 4 1/8″ x 5 3/8″. The sentiment comes from the cut-apart sheet and is backed with metallic gold cardstock.
I’ll be honest—this one had a bit of a crafting “oops.” I used a ticket punch on the sentiment and immediately realized I didn’t love it after the first cut. It happens!

For this version, I used 110 lb black cardstock for the strips, and I really like the shadow effect it creates.

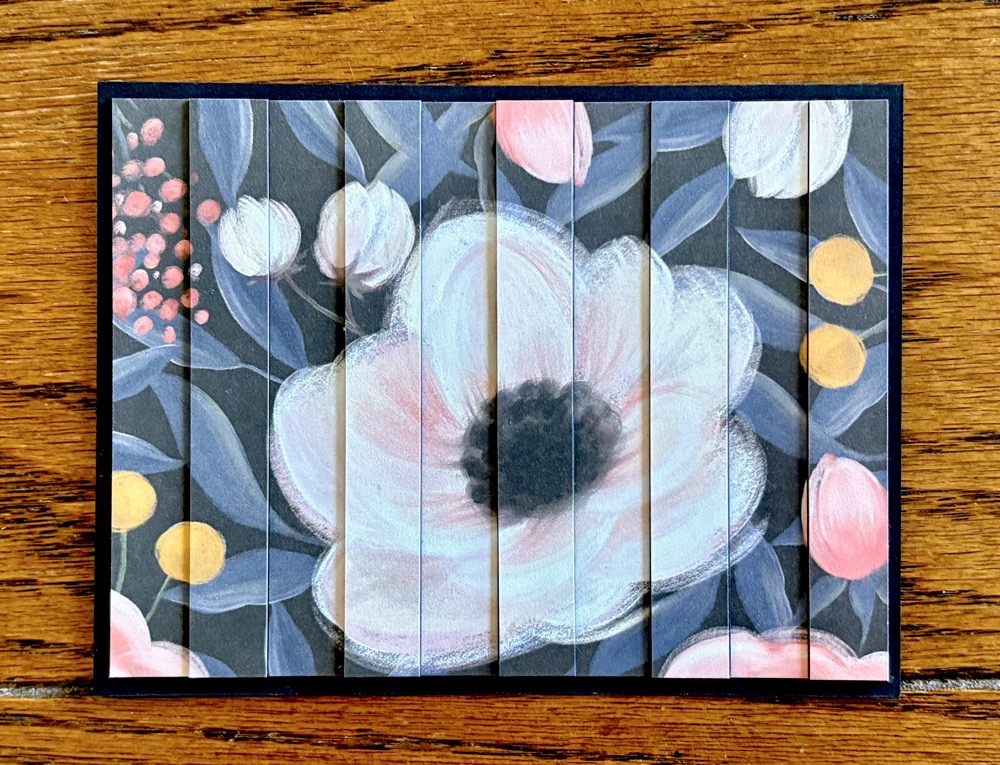
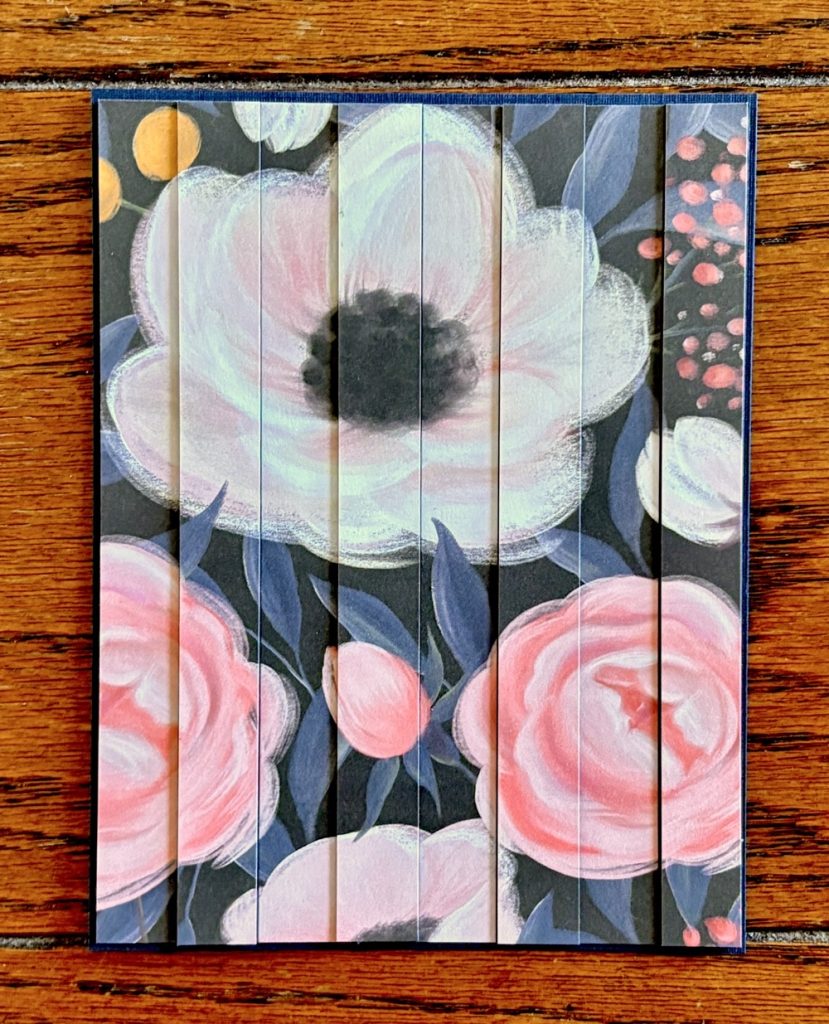
Example #4 Floral Card Fronts
At this point, I just couldn’t stop.
I created these two card fronts using pattern paper from the Fantasy Floral paper pad by Recollections. Both use 110 lb black cardstock for the dimension, which really helps the design stand out.
Final Thoughts
Thank you so much for joining me for today’s How to Make Beautiful Double Vision Cards Easily post. I absolutely love how all of the cards turned out today.
This is such a unique design, and it’s a great way to give a simple piece of patterned paper that extra something without a lot of extra effort. It’s also a fantastic way to use larger images from 12″ x 12″ paper pads—cutting them into strips really transforms the look while still letting the design shine.
I’d love to know—which one is your favorite? And is this a technique you think you’ll try? Let me know in the comments.
Until then, I hope you have an amazing week, and I’ll see you back in the craft room again soon!
Shop for Supplies Here

PIN THIS POST FOR LATER!
