
Welcome back to the craft room and today’s Let’s Make a Card with Heat Transfer Vinyl post. Did you know that you can use heat transfer vinyl (HTV) on cardstock? In today’s post I’m going to show you how and, in the process, we are going to make a cute birthday card. I have a corresponding YouTube video if you would like to follow along visually, or stick around here and I’ll walk you through the step-by-step process.
Preparing the Design
For today’s project I am using a cute little daisy outline. I am almost certain I downloaded this design from Creative Fabrica, but I am unable to find the file. I will keep looking and when I find it, I will update this post and the corresponding video.

Cricut Design Space
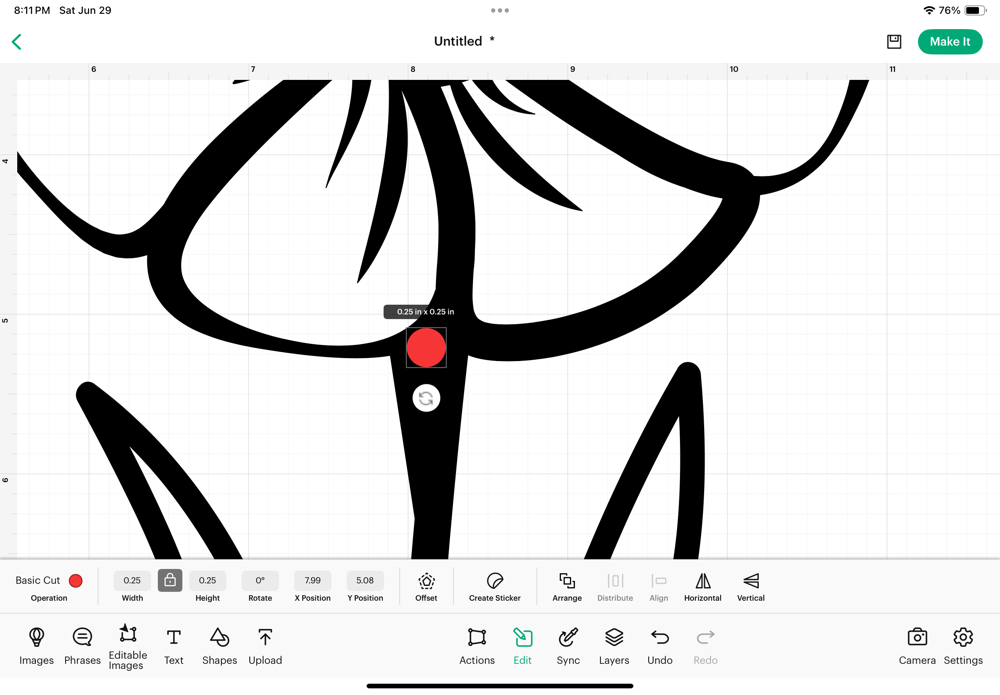
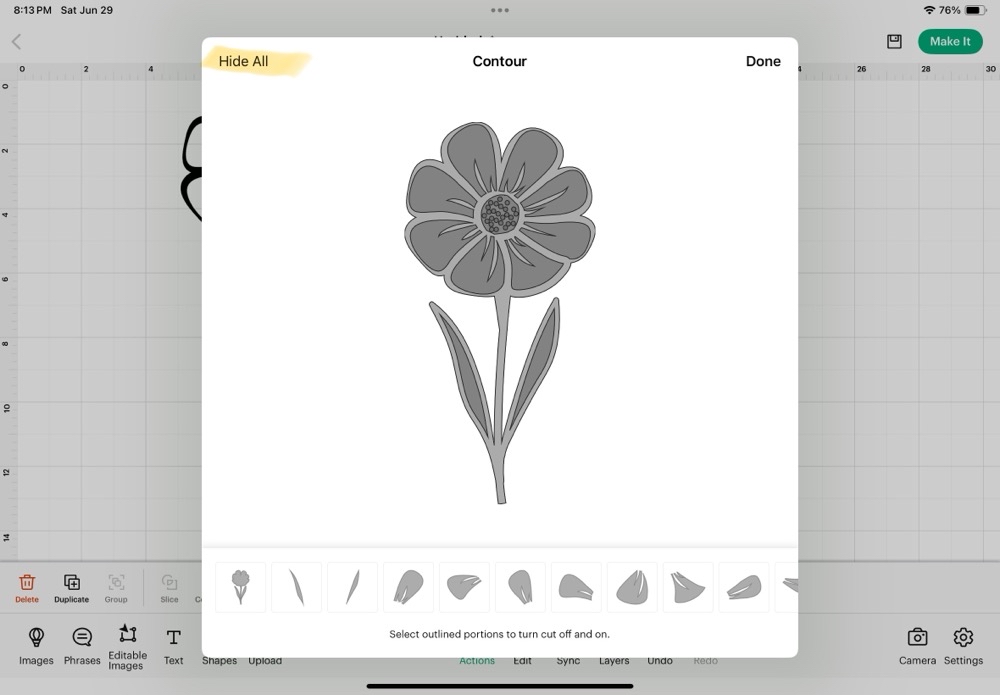
Our first step for today’s projects starts in Cricut Design Space. This flower is a single outline, however, to make the design we want we need to cut two different versions of it. We will need the original outline and a solid background. To do that we need to use the “contour” tool. To use this tool, we need to first use the “weld” function. We will use that function to fix a small space between the flower and stem that was not filled in.

If I did nothing to this space, my Cricut would have made that cut, and with the smaller size needed for the card front, that cut would be a mess. So, I used a simple circle, sized down to .25”, and placed it over the open space. After selecting both the flower and the circle, from the “Actions” button, I chose “Attach” and “Weld”.
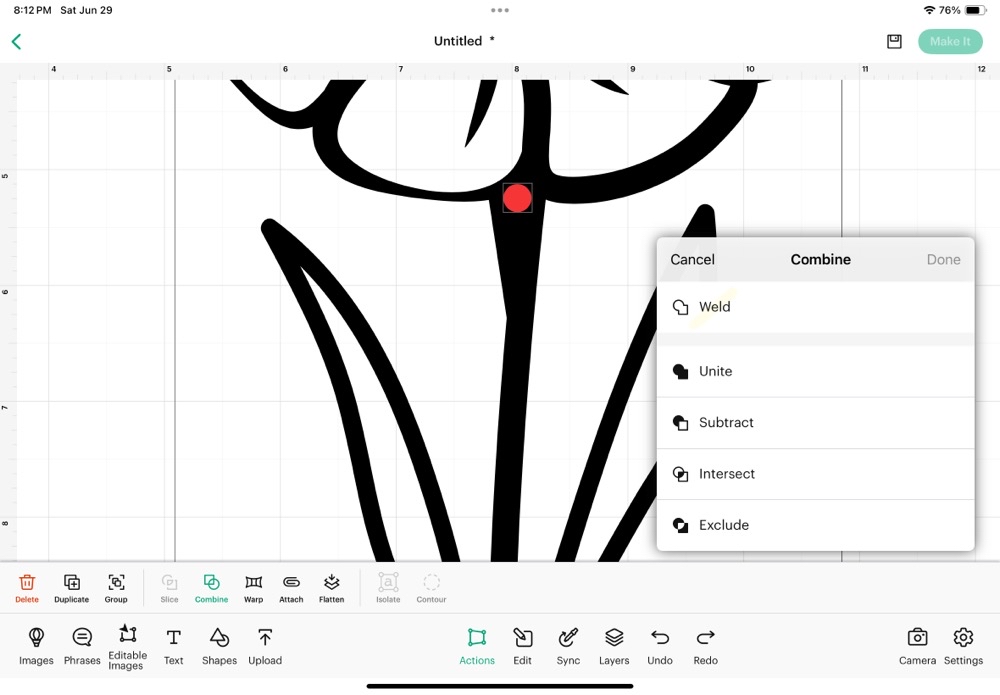
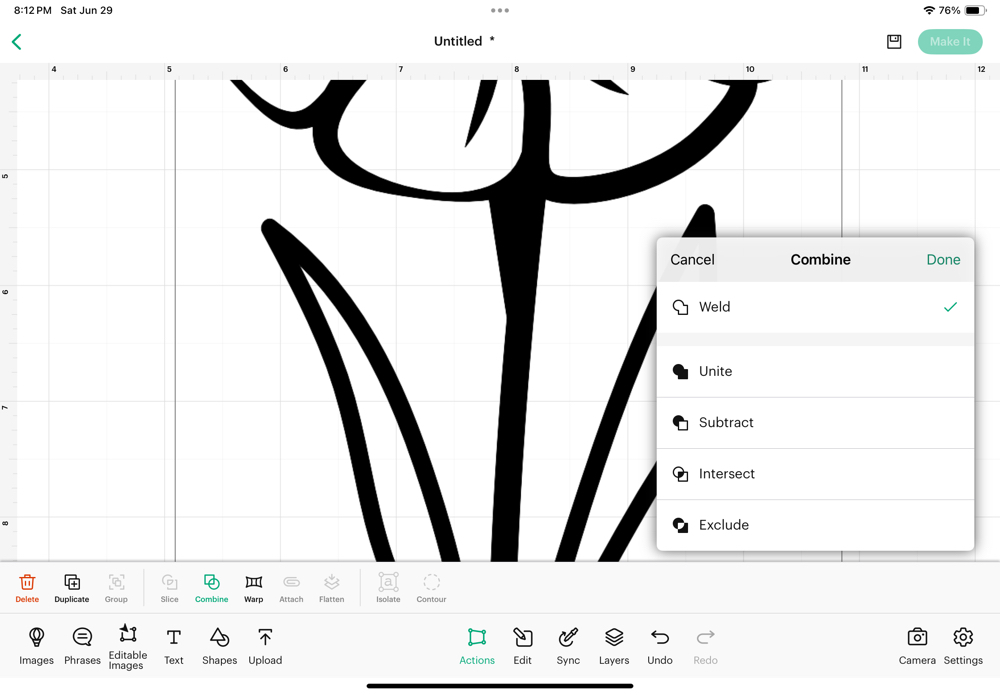
Now, through the magic of Design Space, (that I don’t understand) we are able to use the “contour” function. I began by duplicating my flower, highlighting one of them and clicking “contour”, select “Hide All” and then “Done”. I now have a solid base layer of my flower. After changing the color, I aligned the two layers and grouped them together for the next step.
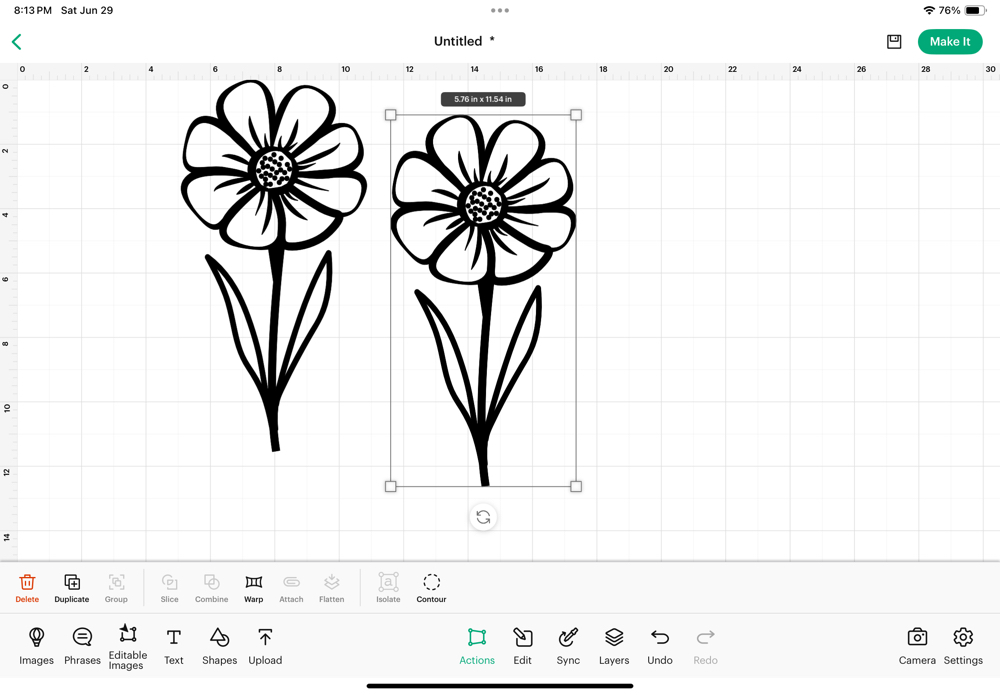
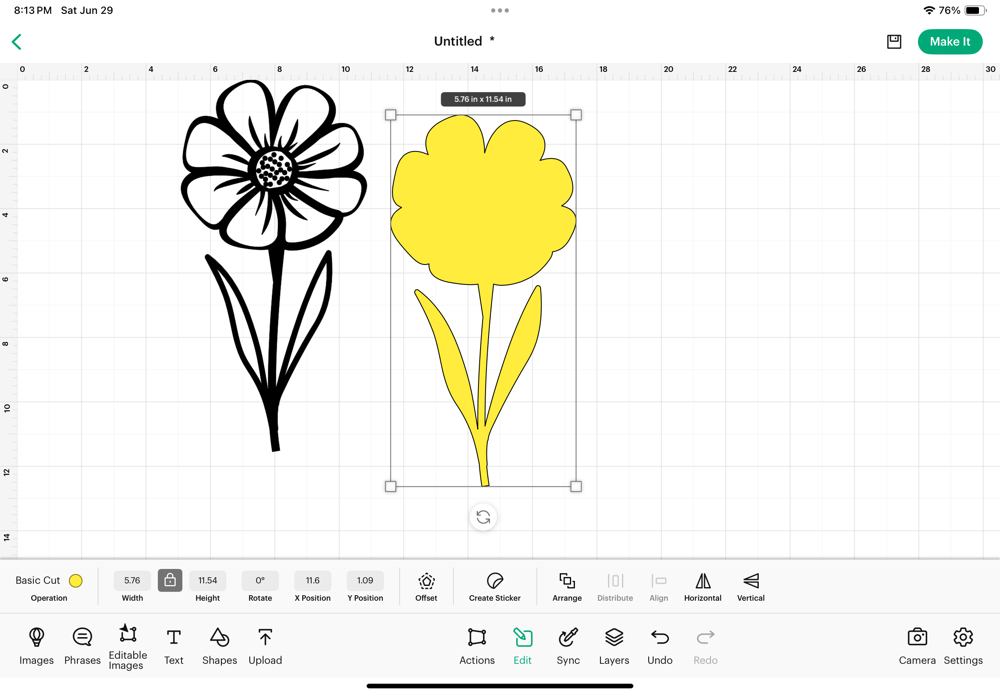
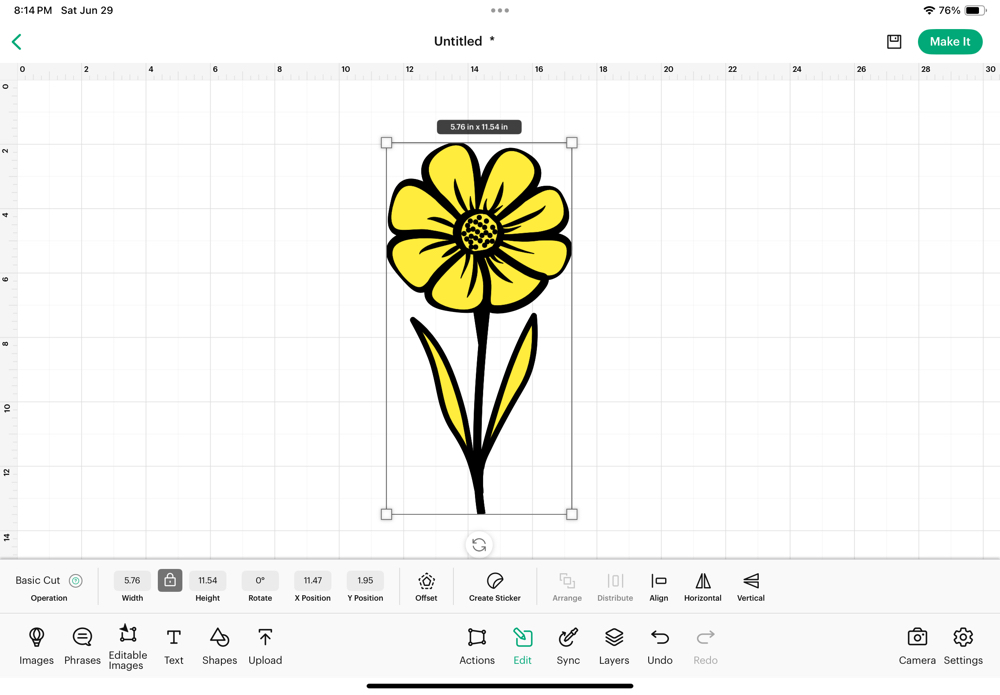
I cut my outline layer from a piece of Siser Easyweed HTV and used the “Everyday Iron-on” setting with the default pressure. My base layer is a piece of Recollections 110lb card that was cut with the “Cardstock for intricate cuts” option also with the default pressure. Because I am not working with text, mirroring the image is an option. However, I find it best to always use this option when working with HTV.
Weeding the Design
One of my reasons for switching to Siser EasyWeed for my HTV needs is because it is so very easy to weed. Even intricate designs are simple to work with. Having said that, you may notice in the finished outline, the center of the flower is different from the original design. Because I had to shrink this image down so much to fit on a card front, the center dots did not cut well. This is not an issue with the HTV, but rather an issue with the cutting machine. The spots were just too small. When weeding the design, more of them came up with the surrounding vinyl so it was just easier to completely remove the entire piece.

Coloring the Base Layer
When coloring the flower, my initial thought was to use the lightest Copic color, RV63, to fill in the entire floral area. It took a moment or two to realize that would not work with this design. Instead, I began by only coloring what would be outer petals. I then added the lightest green, G24, to the leaves.

Adding the Outline
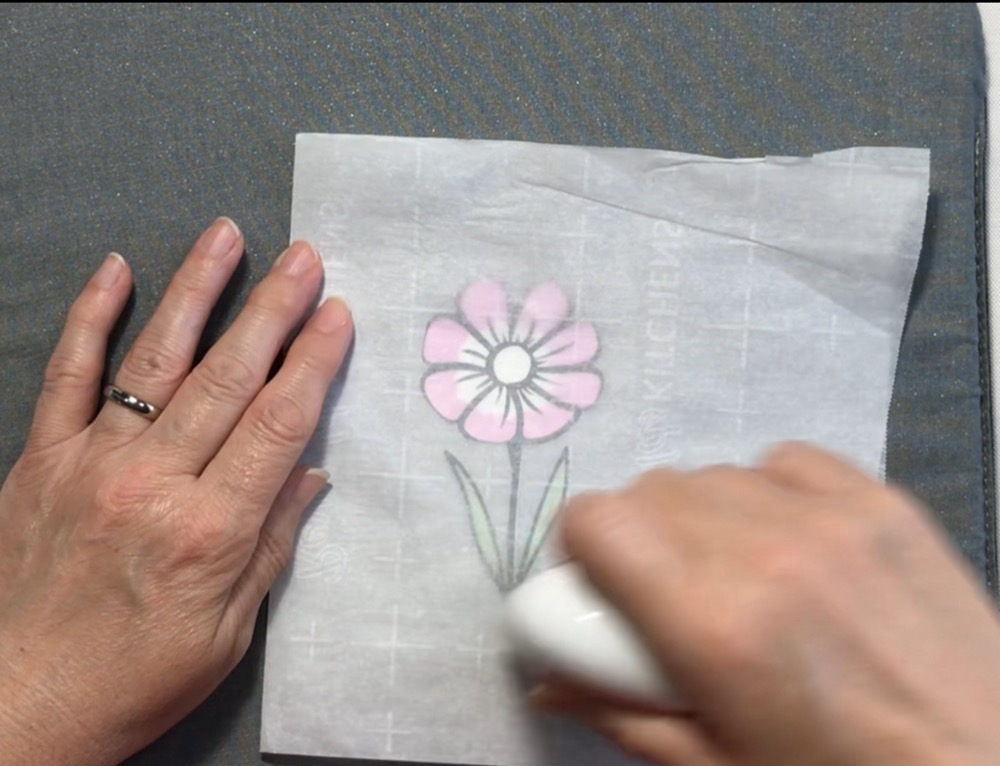
To add the HTV Outline to the flower, I set my Cricut EasyPress Mini to the first heat setting. I began by heating the floral image between a piece of folded parchment paper to ensure the Copic ink was dry. After lining up the outline, I heat the entire piece for a few moments. Before peeling the cover sheet back, I cooled the piece on my desktop. If the vinyl started to peel up with the cover sheet, I placed it back under the parchment and heated it again. After fully removing the cover sheet, I once again, ran the Cricut Mini press over the image to ensure all the HTV was fully adhered to the flower.
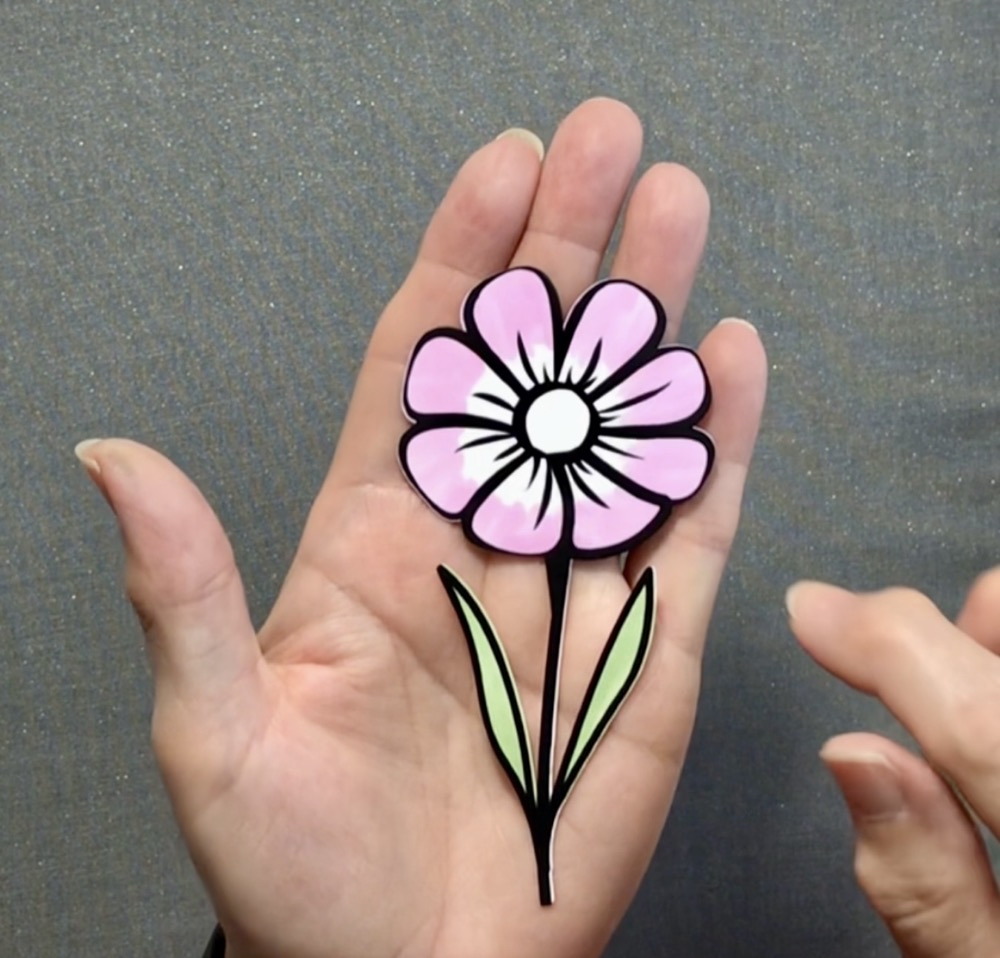
To finish coloring the flower, I started by filling in the remainder RV63 to the center of the petals. I then added the darker RV66 in a flicking motion from the base of the petals to the center. After blending that out with RV63 I moved to the flower center with E19. To finish off the leaves, I added G28 to the base and tip of each leaf before blending the color out with more G24. Because I did not get the HTV lined up perfectly, I did have to edge the stem and right leaf with G24. The finished flower is so pretty!

Let’s Make a Card With Heat Transfer Vinyl
To create the card, I began with a piece of black Recollections 110lb card. This piece was cut to 8.5” x 5.5” and scored at 4.25” for a side folding card base. The embossed card mat was found in my stash of supplies. The mat had been embossed with the Beveled Diamond’s 3D embossing folder by Spellbinders. This folder created such a beautiful piece, but it is difficult to get the full effect in a photograph. The panel was then adhered to the card base with Scor-tape.

Because there is so much dimension with the card mat, I only used Scor-tape and Art Glitter Glue to attach the flower to the card front. The sentiment is made with my Kaiser Kraft Occasions stamp set. I lined up a piece of black card in my Mini Misty and stamped the image with VersaMark ink. I then used Ranger White Embossing powder with my Wagner heat tool to finish the sentiment. To add a bit of dimension to this piece, I added two additional layers of cardstock to the piece and used both Scor-tape and Art Glitter Glue to adhere it to the flower and card front.
The Finished Card
I absolutely love how this card turned out! There is so much dimension and texture with the embossed panel as well the added Heat Transfer Vinyl. It is also what I would consider a clean and simple card.

With this side angle you can get an idea of the amount of texture this 3D embossing folder adds to the card front.

Thank you so much for joining me for today’s Let’s Make a Card with Heat Transfer Vinyl post. Have you ever used HTV on a card before? Let me know in the comments below if you have ever used this technique in your card making. I now have so many ideas for new cards featuring this technique running through my mind. If you would like more birthday card ideas, check out this category link: Birthday Cards. I hope you have a fantastic week ahead, and I will see you back in the craft room soon!
Shop for Supplies Here

PIN THIS POST FOR LATER
